Getting Started With Bokashi
pickle your Kitchen waste
By Raju Rajan and Paul Merkelson
Raju and Paul have over 25 years of combined experience with pile composting and vermicomposting. We have recently started experimenting with indoor food waste recycling using the Bokashi technique. This blog article is meant to document our “beginner’s mind” learnings to date, and not to be mistaken for expert advice!
You can reach Raju - raju@idli.net or Paul - paul.merkelson@gmail.com with comments or suggestions.
What is Bokashi Fermentation?
Many of us are familiar with composting – a technique for turning kitchen and yard waste into fertile humus. In composting the micro-organisms that breakdown the organic use the oxygen in the air. That’s why they are called aerobic microbes. Composting is environmentally beneficial because it helps keep organic matter like food scraps and yard waste out of the landfill where it can contribute up to 20% of greenhouse gas emissions. It aso enriches the soil which reduces runoff and water usage, through greater absorption. And it generates a host of beneficial microbes for your plants.
The Bokashi process creates a pre-compost using a different set of micro-organisms called anaerobic microbes. As the name suggests, these microbes break down organic matter in the absence of oxygen. The process is called fermentation and is familiar to anyone that has made yogurt or sauerkraut or beer. Bokashi typically uses a specially curated set of organisms marketed as “Effective Micro-organisms” (EM). These organisms break organic matter down into alcohols, acids and carbon dioxide – hence fizzy beer or sour vinegar!
We recently held an online ReWild Bokashi Workshop with Shig Matsukawa, who has worked with the Bokashi process for over 20 years at large scale composting operations in New York and Japan. Our purpose was to inform and encourage you to consider Bokashi as one of the safe, efficient and effective methods of removing your food scraps from the waste stream, and creating a nutrient rich amendment for your compost and/or garden. Shig did a great job of educating us about the science of Bokashi. His experience and knowledge are an invaluable resource
An easy reference guide by Shig is here: http://www.recyclefoodwaste.org/files/FFW_booklet_2sidedFold.pdf and his full presentation is also online.
Why Bokashi?
We know you’re wondering, “Why on earth would I pickle my waste?”
One of the advantages of Bokashi for us over putting food scraps directly into our compost heaps, worm bins and rotary composters is that the Bokashi process does not attract insects or animals and produces little or no odors. Bokashi works throughout the year and it is an easy process to ferment kitchen waste indoors during winter, turning it into spring fertilizer. No more cold and wet trips to the compost heap to dump your food scraps. Another advantage is that Bokashi accepts a wide variety of food stuff including diary and meat that cannot be directly composted.
Since Bokashi is a pre-compost the fermented food waste needs to be decomposed before plants can use it. In other words, composting and fermentation are complementary activities.
Beginner’s Guide
We have been getting a number of queries about getting started. The simple 3 step “Beginner’s” process for starting to ferment kitchen waste is as below:
Step 1: Get the right equipment:
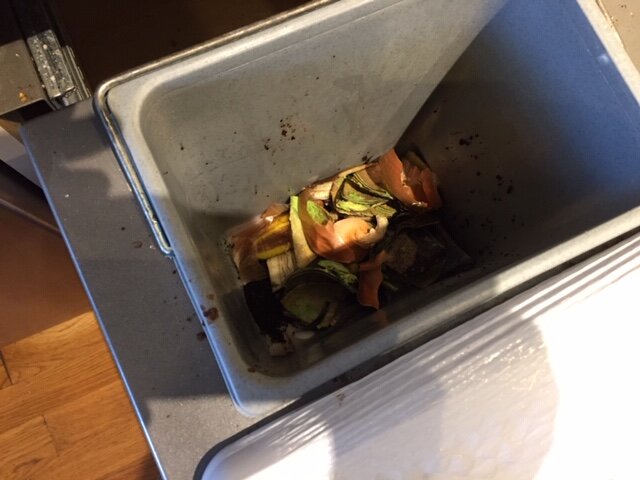
A handy kitchen bucket to throw your kitchen waste and then put in the Bokashi bin every day. No need to buy anything for this … just use an existing container if you have the right one. But if you’re currently trashing your kitchen waste and need a bucket for the waste, pick something like this one has with an inner pail so you don’t need plastic bags, and can rinse it out easily.
Two Bokashi buckets that ferment away in your basement or shed. (One that you are filling with your food scraps, and one that has already been filled and is fermenting for 2 weeks)
Bokashi Bran: Shig spent quite a lot of time describing the process of making the Bokashi bran. You do not have to do that. You can start by just buying it online – For example: Bokashi Bran is available on Amazon. (As more people start Bokashi, we may get together and make the Bokashi bran ourselves as a group. For more advanced users here are some easy reference video clips on making activated EM and making Bokashi Spray.)
Step 2: Kitchen waste to bokashi bin
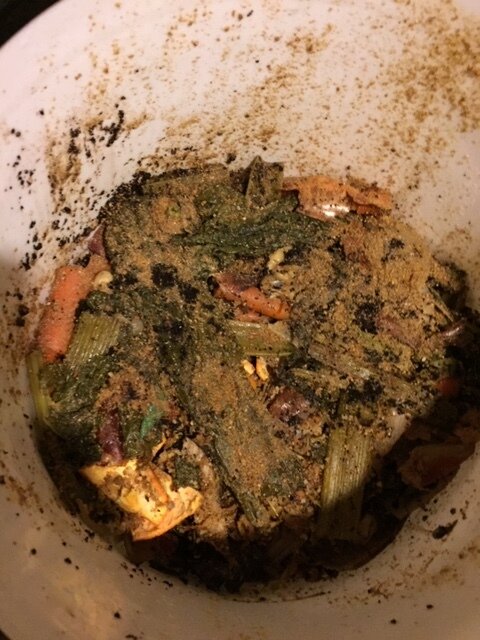
Once a day, put your waste from the kitchen bucket into the Bokashi bucket, throw in a handful of Bokashi bran and pack tightly. Then put on the lid is make sure it is airtight
Step 3: Let it Ferment
Once the bucket is full (or heavy enough) close it air tight and set it aside for 2 to 3 weeks. Once a week, drain the liquid at the bottom of the Bokashi Bucket using the tap. This liquid, called “Bokashi tea” is acidic and teeming with “good” microbes. Dilute it with water 100:1 and use on your plants, and put the rest down the drain. These microbes eat up the gunk in your pipes and prevent clogs. (Please dilute the tea if you have copper pipes.)
You should also think about what you are going to do with the fermented Bokashi when it’s finished fermenting after the 2 weeks. It will have to decompose for at least another 2 weeks, covered with compost or soil.
There are 4 basic alternatives for this
Put it in a rotary composter with soil and let it compost. Then feed it to plants.
Compost it in your compost heap. it will help produce rich compost much more quickly
Bury it in a trench or hole in your vegetable garden or in an open space to use later
Mix 1/3 fermented Bokashi with 2/3 soil in a container to make a rich soil. It’s called a soil factory and can then be used on your plants
There is a lot of information on the web – pick something easy that works for you and just get started!
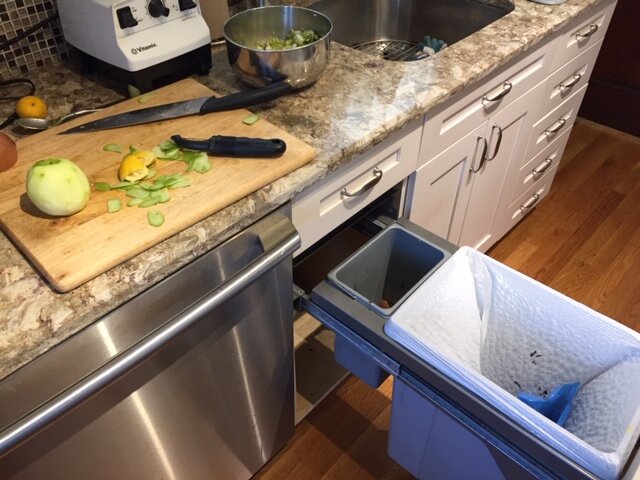
Paul’s Experience
Here is what my set up looks like